本文最后更新于 2026年4月8日 晚上
2025-12-18 17:13:52
个人电脑篇
从零开始配环境
第一步:创建环境
打开 anaconda prompt,输入以下命令,切换到项目文件夹
1 (base) C:\Users\xxxx>cd /d "D:\CodeFiles\Project"
命令行变为:
1 (base) D:\CodeFiles\Project>
然后,选择 Python 版本,创建项目环境
1 (base) D:\CodeFiles\Project>conda create -n proj_env python=3.9 -y
会输出:
1
2
3
4
5
6
7
8
9
10
11
12
13
14
15
16
17
18
19
20
21
3 channel Terms of Service accepteddone done done done
第二步:激活环境
激活环境
1 (base) D:\CodeFiles\Project>conda activate proj_env
变成
1 (proj_env) D:\CodeFiles\Project>
第三步:安装依赖
明确给出依赖文件
寻找项目文件夹中的依赖 requirements.txt 或者 environment.yml 文件,输入以下命令安装依赖
1 (proj_env) D:\CodeFiles\Project>pip install -r requirements.txt
1 (proj_env) D:\CodeFiles\Project>conda env update --file environment.yml --prune
特别地,添加国内镜像源可以加速下载。
1 2 3 4 5 6 7 8 set show_channel_urls yes
添加之后再输入
1 conda env update --file environment.yml --prune
当显示如下信息,就说明我们的环境已经配置成功了!😃
1
2
3
4
5
6
7
8
9
10
11
Successfully installed ...done
手动安装依赖
如果没有 requirements.txt 或者 environment.yml 文件,可以手动安装依赖。
1
2
3
4
5
6
7
8
9
10
11
第四步:删除环境
Anaconda Prompt 不能删除当前正在激活的环境,所以先确保你处于 base 环境(默认)或其他非目标删除环境!
如果你当前就在要删除的环境 my_env 中,可以先切换回 base 环境:
1
2
3
4
(my_env) C:\Users\xxxx>conda activate base
然后查看环境列表
1 (base) C:\Users\xxxx>conda env list
会输出
1
2
3
4
5
删除 my_env 环境
1 (base) C:\Users\xxxx>conda env remove --name my_env
输出
1
2
3
4
5
6
7
8
9
10
11
12
13
14
15
16
3 channel Terms of Service acceptedin environment D:\Anaconda\envs\my_env:
选 y 就行。他会继续问你:
1
2
3
4
5
6
7
Downloading and Extracting Packages:done done done continue ?
继续选 y。
检查环境中的包信息
先激活环境
1 (base) C:\Users\xxxx>conda activate proj_env
查看环境中的包信息
1 (proj_env) D:\CodeFiles\Project>conda list
对 conda 源进行管理
先激活环境
查
首先查看所有已配置的 conda 源
1
2
3
4
5
执行后会输出诸如此类的结果
1
2
3
4
5
6
7
channels:
增
添加pytorch清华源
1
2
3
4
(proj_env) D:\CodeFiles\Project>conda config --add channels https://mirrors.tuna.tsinghua.edu.cn/anaconda/cloud/pytorch/
删
移除单个无效源
1 (proj_env) D:\CodeFiles\Project>conda config --remove channels https://mirrors.tuna.tsinghua.edu.cn/anaconda/cloud/pytorch/
重置
重置所有源
1 (proj_env) D:\CodeFiles\Project>conda config --remove-key channels
可能遇到的坑
CUDA 版本问题
PyTorch 与 CUDA 版本不匹配
错误状况
1
2
3
4
5
6
7
8
9
10
11
D:\Anaconda\envs\proj_env\lib\site-packages\torch\cuda\__init__.py:235: UserWarning: for execution on the deviceenable device-side assertions.
解决方法
先在命令行输入下面指令,查看显卡信息
1 (base) D:\CodeFiles\Project>nvidia-smi
会输出
1
2
3
4
5
6
7
8
9
10
11
12
13
14
15
16
17
18
19
+-----------------------------------------------------------------------------------------+
激活环境
1 (base) D:\CodeFiles\Project>conda activate proj_env
卸载旧版 PyTorch
1 (proj_env) D:\CodeFiles\Project>pip uninstall -y torch
安装新版 PyTorch(CUDA 12.8)
1
2
3
4
(proj_env) D:\CodeFiles\Project>pip3 install torch --index-url https://download.pytorch.org/whl/cu128
注释(20260120):不用 conda 是因为 conda 渠道暂未同步 pytorch-cuda=12.8 包,导致PackagesNotFoundError
flash-attn 版本问题
摘抄自 知乎 末影花生 Flash Attention 保姆级安装指南
官方仓库 中的 flash-attn 的文件名都形如:
1 2 cp (312)-cp (312)-linux_x86_64.whl
我们需要分别确认各组件的版本号,这样才能找到对的 flash-attn 版本。
第一步:确认环境 Python 版本。
1
2
3
4
3.12.x 对应着 cp312-cp312(第一个 cp312 表示编译该包时使用的 Python 版本,第二个 cp312 表示该包所兼容的 Python 版本)
第二步:确认 CUDA 版本。
1
2
3
4
5
6
7
8
此处 CUDA 对应 cu11
第三步:确认 PyTorch 版本。
1 2 3 4 "import torch; print(torch.__version__)"
此处 torch 对应 torch2.6
第四步:选择对应版本 Flash-Attention 进行安装。
1 (proj_env) D:\CodeFiles\Project>pip install https://github.com/Dao-AILab/flash-attention/releases/download/v2.7.3/flash_attn-2.7.3+cu11torch2.6cxx11abiTRUE-cp312-cp312-linux_x86_64.whl
AutoDL 篇
创建环境
就和上面本地情况相差不大,但 Linux 上在创建环境之后,不能直接 conda activate,而是要先刷新。
例如,你有可能会遇见类似下面的报错:
1 2 3 4 5 6 7 8 9 'conda init' before 'conda activate'
此时,我们需要进行刷新。依次输入下面指令即可:
1
2
3
conda init bashsource ~/.bashrc
批量下载文件
如果是少量小文件,直接从 JupyterLab 中的文件夹里 download 即可;如果是想打包整个文件夹,可以先压缩再下载。
在终端中输入:
1
2
解压也是类似:
1
2
unzip my_code.zip
清理系统盘缓存
autodl 通常会把许多默认文件放在 /root/.cache/ 下,系统盘空间就那么大,我们需要仔细维护。
此外,还可以每次跑实验前输入下面指令,将模型下载到数据盘中。
1 export HUGGINGFACE_HUB_CACHE=/root/autodl-tmp/huggingface_cache
学校服务器篇
参考了组里师兄的文档 以及 B站up主 丘比特的帽子 《深度学习服务器的使用方法》
如何连接
第一步:打开命令行,输入如下指令,生成个人公钥、私钥。
1
2
C:\Users\xxxx>ssh-keygen
此处修改文件名为 chen2026_rsa 并保存到 C:\Users\xxxx\.ssh 文件夹下。
1
2
3
4
5
Enter file in which to save the key (C:\Users\xxxx/.ssh/id_rsa): C:\Users\xxxx/.ssh/chen2026_rsafor no passphrase):'s randomart image is: ...(一个图)
第二步,打开路径 C:/Users/xxxx/.ssh/,其中有 chen2026_rsa(私钥)与 chen2026_rsa.pub(公钥)两个文件,将公钥交给管理员。管理员会在主机上完成注册,然后会发来 用户名、初始密码 以及 IP+端口(通常为静态地址,例如 12.345.6.789:12345)。
用户后续的所有操作都会在服务器的 /home/chen2026/ 中进行。
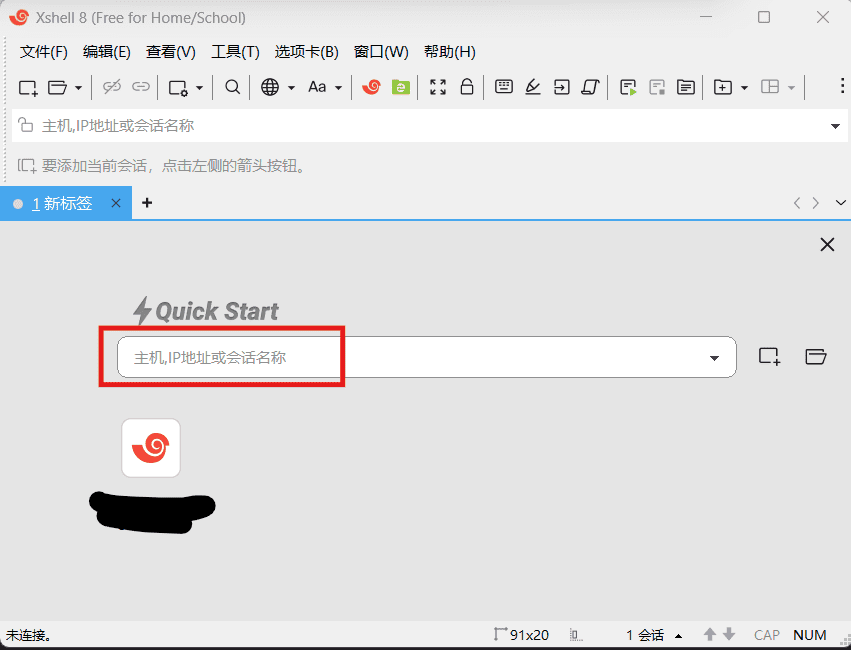
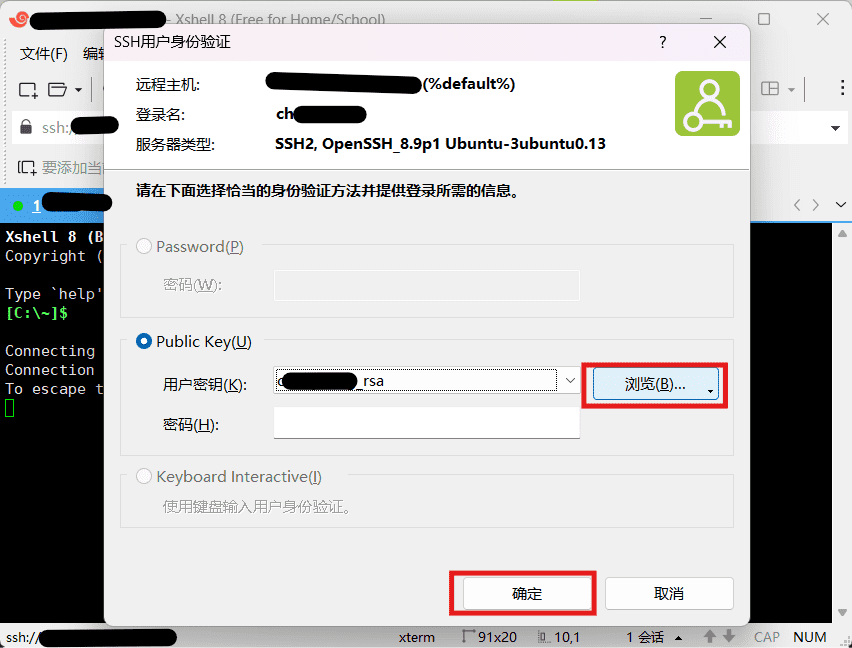
第三步,下载家庭学校免费版 Xshell ,按如下步骤即可连接至服务器。
其中,第三步先点“浏览”找到本地私钥(chen2026_rsa),再点“确定”。
在第一次成功连接之后,每次登陆前点击 图1 红色方框下方的历史记录即可快速登陆。
创建与运行自己的项目
上传项目文件
服务器的文件结构
下载家庭学校免费版 Xftp 可以上传代码、图片或者数据集文件。
安装 Anaconda 3
知乎 tRNA赐我力量 Ubuntu Anaconda 完整安装指南 (含避坑指南)
下载安装包
使用官方源
1 wget https://repo.anaconda.com/archive/Anaconda3-2025.12-1-Linux-x86_64.sh
或使用清华源
1 wget -c https://mirrors.tuna.tsinghua.edu.cn/anaconda/archive/Anaconda3-2025.12-1-Linux-x86_64.sh
安装过程
运行脚本(待安装完毕后,记得删除以节省空间)
1 bash Anaconda3-2025.12-1-Linux-x86_64.sh
进入安装界面后,按 Enter 键继续
1
2
3
4
5
Welcome to Anaconda3 2025.12-1continue the installation process, please review the licensecontinue
然后会输出许可协议,输入 yes 继续
1
2
3
By continuing installation, you hereby consent to the Anaconda Terms of Service available at https://anaconda.com/legal.yes |no]
之后可以自定义安装路径(学校服务器的 home 分区满了,所以只能安装在 data 分区了)
1
2
3
4
5
6
7
8
Anaconda3 will now be installed into this location:
然后开始跑进度条,等待安装结束,最后输入 yes 以完成初始化。
1
2
3
4
5
6
conda config --set auto_activate_base false $SHELL `yes |no]yes
最后,输入 source ~/.bashrc 刷新配置文件以激活环境,出现 base 说明激活成功。我们可以顺手验证一下版本号,看看是否安装成功。
1
2
3
4
Thank you for installing Anaconda3!source ~/.bashrc
补:Kimi 推荐的配置
Kimi 推荐使用如下文件结构进行管理。
1
2
3
4
5
6
7
8
/data/chen2026/
想做到这一点,我们需要在上面安装过程完毕后,使用如下命令进行配置。
1
2
3
4
5
6
7
(base) chen2026@ubuntu-NF5468M6:/data/chen2026$ conda config --add envs_dirs /data/chen2026/conda_envs
可以看到,环境文件会优先下载到我们专门创建的 conda_envs 文件夹下,而包缓存会被下载到 conda_pkgs 文件夹下。
配置环境
大致过程与 PC 上的差不多,在这里特地写一笔的原因是——就像刚刚说的那样,服务器的 /home 已经爆满了,我需要把 pip 缓存的默认路径改到 /data 中。否则会有:
1
2
3
4
5
6
7
8
9
ERROR: Could not install packages due to an OSError: ("Connection broken: OSError(28, 'No space left on device')" , OSError(28, 'No space left on device' ))in : <function _TemporaryFileCloser.__del__ at 0x767e527d77e0>"/data/chen2026/conda_envs/project/lib/python3.11/tempfile.py" , line 467, in __del__"/data/chen2026/conda_envs/project/lib/python3.11/tempfile.py" , line 460, in close
首先,清除 /home 中的旧缓存。
1 2 3 4 5 6 7 dir
然后,我们修改 pip 的缓存配置,依次输入如下指令(不用担心 global 的问题,此处的 global 只对该用户生效)
1 2 3 4 mkdir -p /data/chen2026/pip_cacheset global.cache-dir /data/chen2026/pip_cache
终端中会输出
1 Writing to /home/chen2026/.config/pip/pip.conf
最后,我们可以验证一下是否设置成功:
1
2
3
4
(my_env) chen2026@ubuntu-NF5468M6:/data/chen2026$ pip config list'/data/chen2026/pip_cache' dir
这说明我们已经将缓存路径修改成功了。
但这还没完,pip 临时文件的路径也默认在 /home 中,如果不改的话依旧会报错。我们还需要再修改一下。
1 2 3 4 5 6 7 8 9 mkdir -p /data/chen2026/pip_tmpecho 'export TMPDIR=/data/chen2026/pip_tmp' >> ~/.bashrcecho 'mkdir -p /data/chen2026/pip_tmp' >> ~/.bashrcsource ~/.bashrc
这次就彻底大功告成了。
运行代码
Hugging Face 连不上
使用镜像站 https://hf-mirror.com/
1 2 3 export HF_ENDPOINT=https://hf-mirror.com
实验室文明
如果他人在某卡上运行代码,我们也跟着运行,这样会占用对方算力,非礼仪之邦的行为。如何鉴别哪些卡是无主的呢?
命令行输入
服务器会打印当前各卡状况与正在运行的进程
1
2
3
4
5
6
7
8
9
10
11
12
13
14
15
16
17
18
19
20
21
22
23
24
25
26
27
28
29
30
31
32
33
34
35
36
37
Wed Apr 1 16:14:30 2026
先看卡上进程的 Type。忽略 G type(Graphics)的 Xorg 进程,这是系统常驻进程。我们主要看 C type(Compute)的进程,这是与计算有关的进程。
再看 Memory-Usage,如果某卡 Memory-Usage 特别小(比如 20 MiB),说明卡可能是空闲的。
如果某卡只有 G type,且 Memory-Usage 很小,说明该卡大概率空闲。我们可以通过 ps 命令查看进程的拥有者,然后查看该用户是否是师兄/弟,从而进行验证。
比如,我要查看进程 239385 的主人,只需输入
服务器输出,
1
2
3
(base) chen2026@ubuntu-NF5468M6:~$ ps -u -p 239385
这样我们就知道 GPU4 是被用户 chen2026 占用了。如果很急卡的话,就可以私信 chen 同学进行协商了。
在指定 GPU 运行代码
首先在命令行输入
就可以知道服务器上有多少张卡、卡的物理编号(第一列,一般从 0 开始编号)是多少。我们通过更改环境变量来选择指定的 GPU。
命令级
第一种方法是“命令级”的:只对当前这一条命令生效,用完即失效,是最推荐的方式。
1
2
3
4
5
6
7
会话级
第二种方法是“会话级”的:在当前终端窗口中,连续运行多条命令都用同一 GPU 配置。
可以用 export 设置环境变量,当前终端会话生效,关闭终端后失效。
1 2 3 4 5 6 7 export CUDA_VISIBLE_DEVICES=1,3
如果想取消当前会话指定的 GPU 配置,运行
1 unset CUDA_VISIBLE_DEVICES
后台运行
tmux 是终端复用器,适合需要随时 attach 回去查看进度的场景。
1
2
3
4
5
6
管理命令
1 2 3 4 5 6 ls
可以实时查看输出、随时切换进出,断网也不会终止训练。
一些奇怪的报错
权限错误
1
2
3
PermissionError: [Errno 13] Permission denied: '/data/chen/project/xxx/src/analysis/orca/orca' for a complete stack trace.
错误信息 PermissionError: [Errno 13] Permission denied 表明 Linux 系统禁止当前用户执行该文件。在 Linux 中,文件需要有 x (可执行) 权限才能被运行。chmod +x 命令就是用来添加这个权限的。先输入如下指令,然后再次运行代码可解。
1 chmod +x /data/chen/project/xxx/src/analysis/orca/orca